Follow the below steps to successfully enable SAML 2.0 authentication.
Notice: SSO & SAML requires the Professional plan. Please contact support if the Authentication tab is not enabled in your Account Settings.
Step 1: Activate SAML based authentication in Develop Diverse
The following can only be done by an Admin
- Access Account Settings via your avatar in the right upper corner.
- Choose the Authentication in the left navigation
- Activate the toggle “Enable SAML 2”
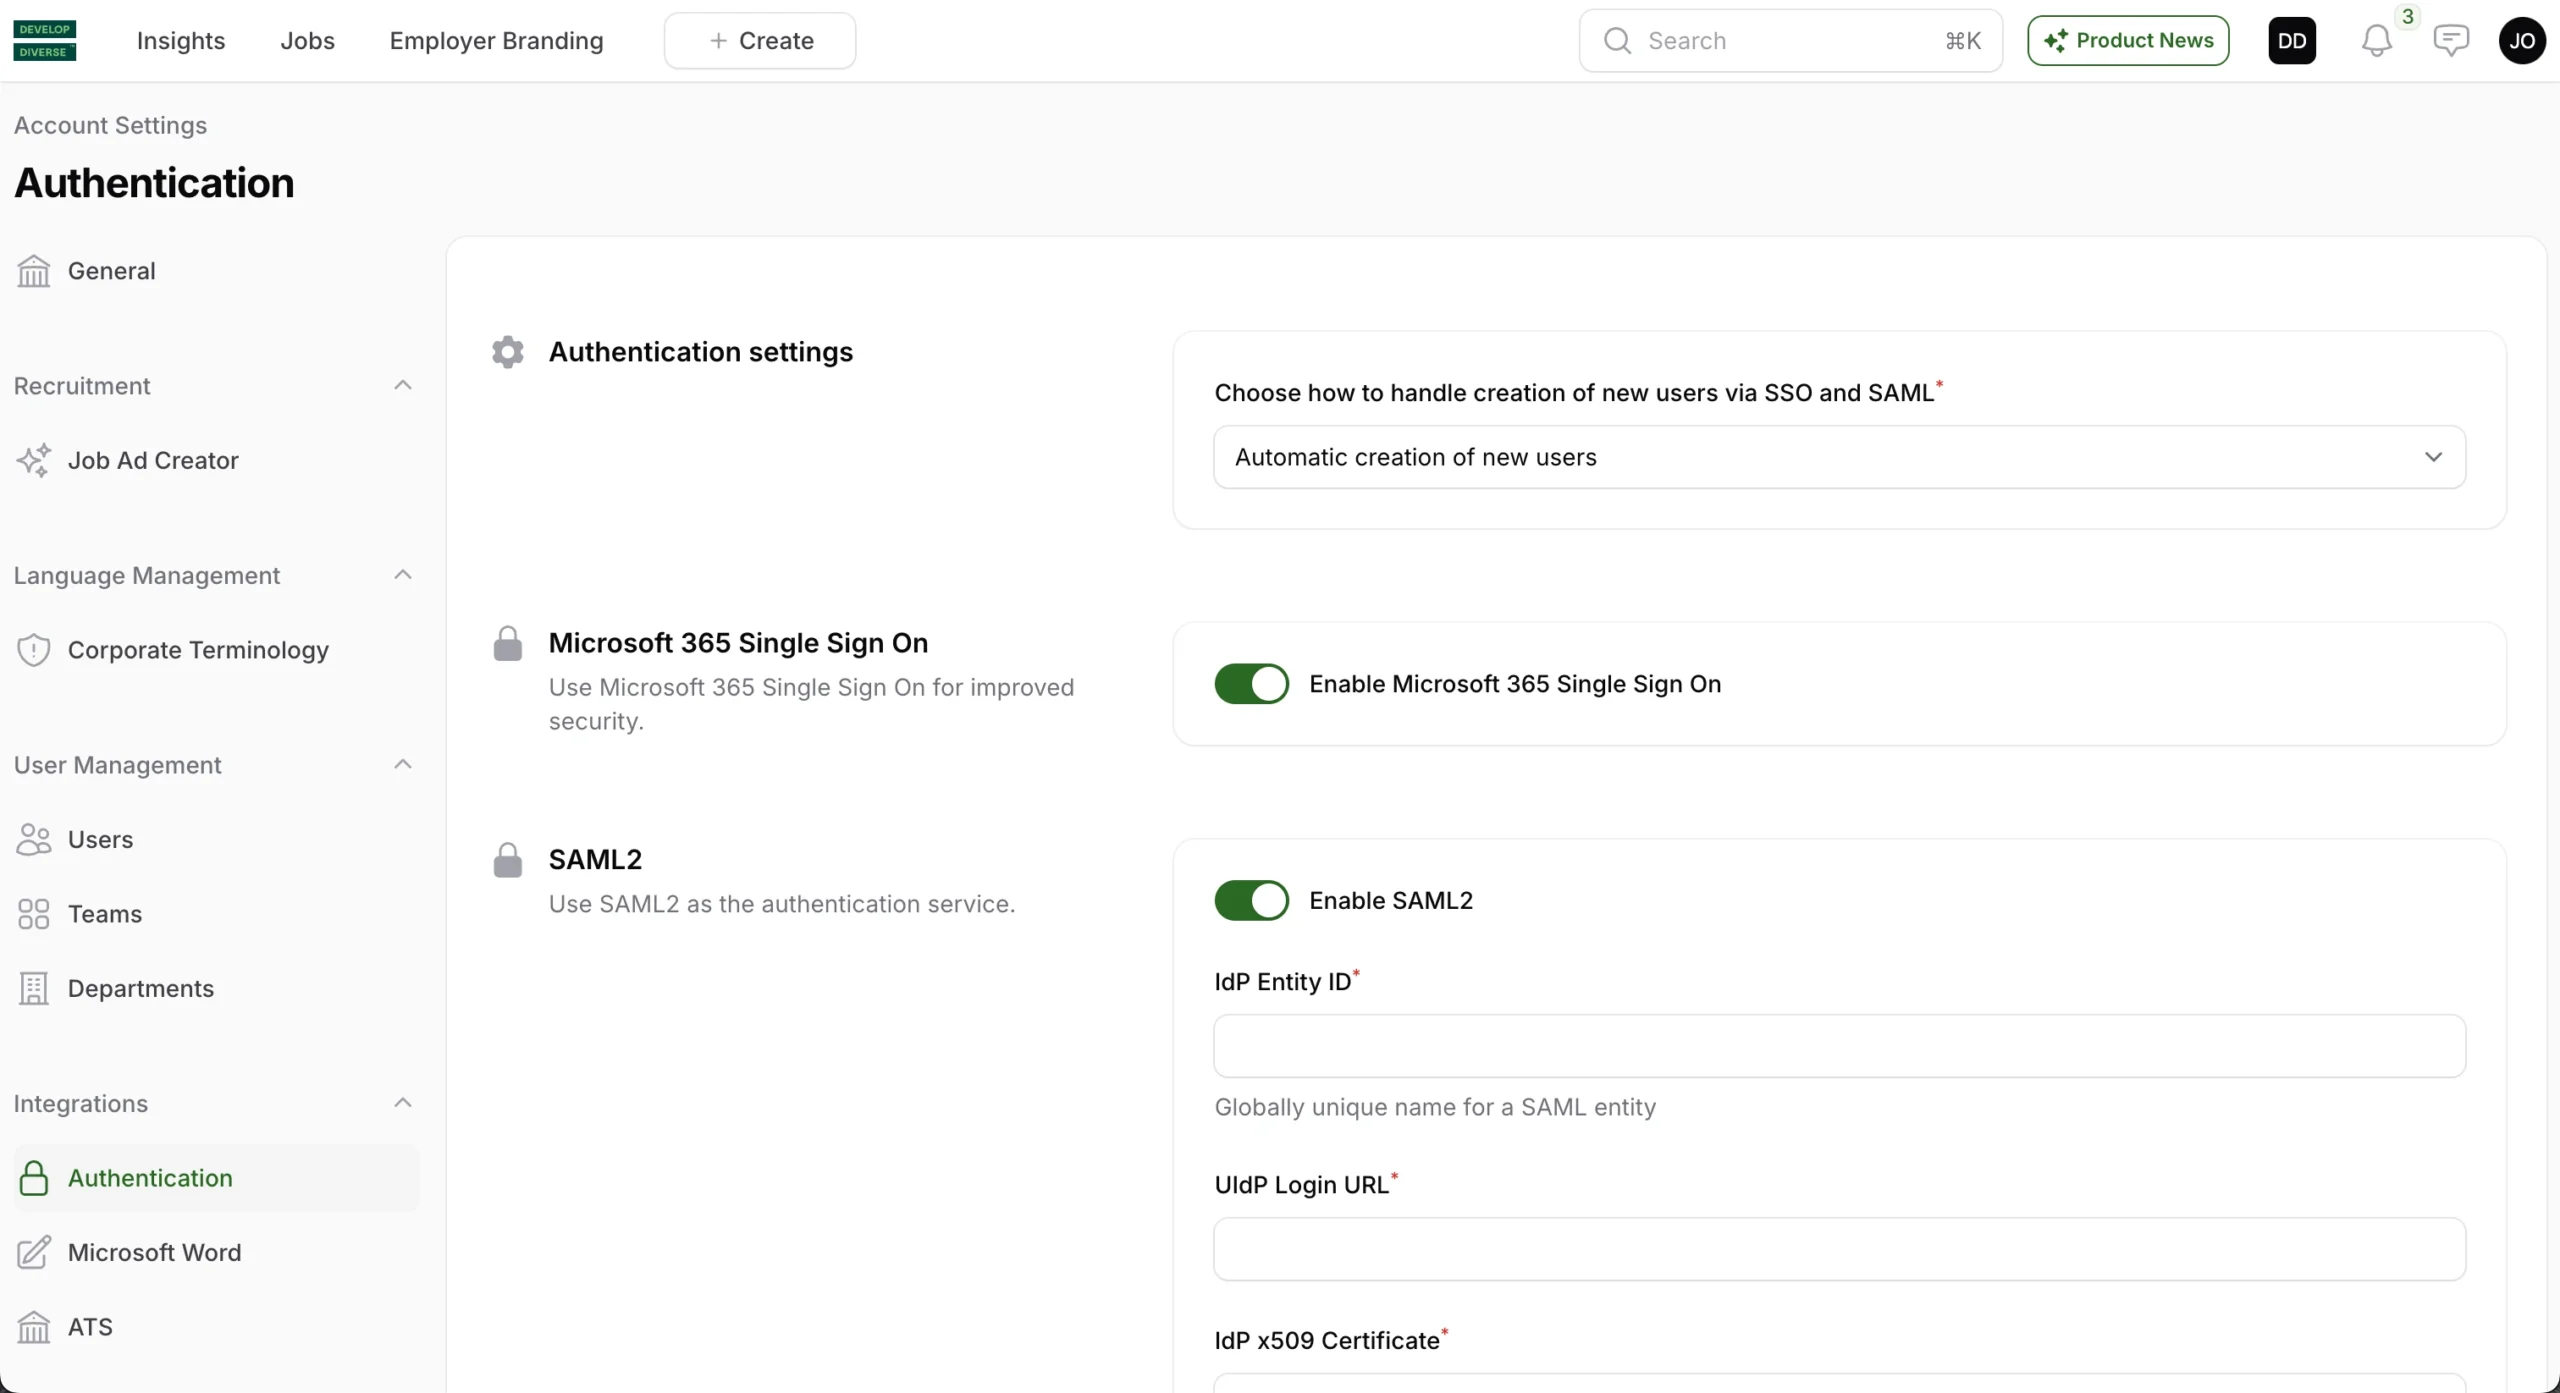
Step 2: Update with Identity Provider information
Your Security & IT team should provide you with Identity Provider information to input into the Account Settings for SAML 2.0.
- Input Identity Provider information
- Entity ID
- Login URL
- Certificate
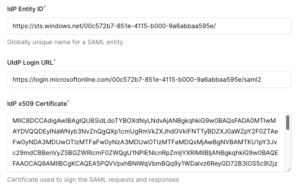
- Click on the button “Save changes” at the bottom.
The following image is an example of what these information would look like:
Step 3: Insert SAML credentials within your Identity Provider
Once the information has been saved, Develop Diverse will generate unique SAML configurations that your Security & IT team should enter into the Identity Provider to finish the setup.
| Identifier (Entity ID) | https://app.developdiverse.com/saml2/unique-key-here/metadata |
| Reply URL (Assertion Consumer Service URL) | https://app.developdiverse.com/saml2/unique-key-here/acs |
| Sign on URL | https://app.developdiverse.com/saml2/unique-key-here/login |
| Relay State | Should be left blank |
| Logout Url | https://app.developdiverse.com/saml2/unique-key-here/logout |
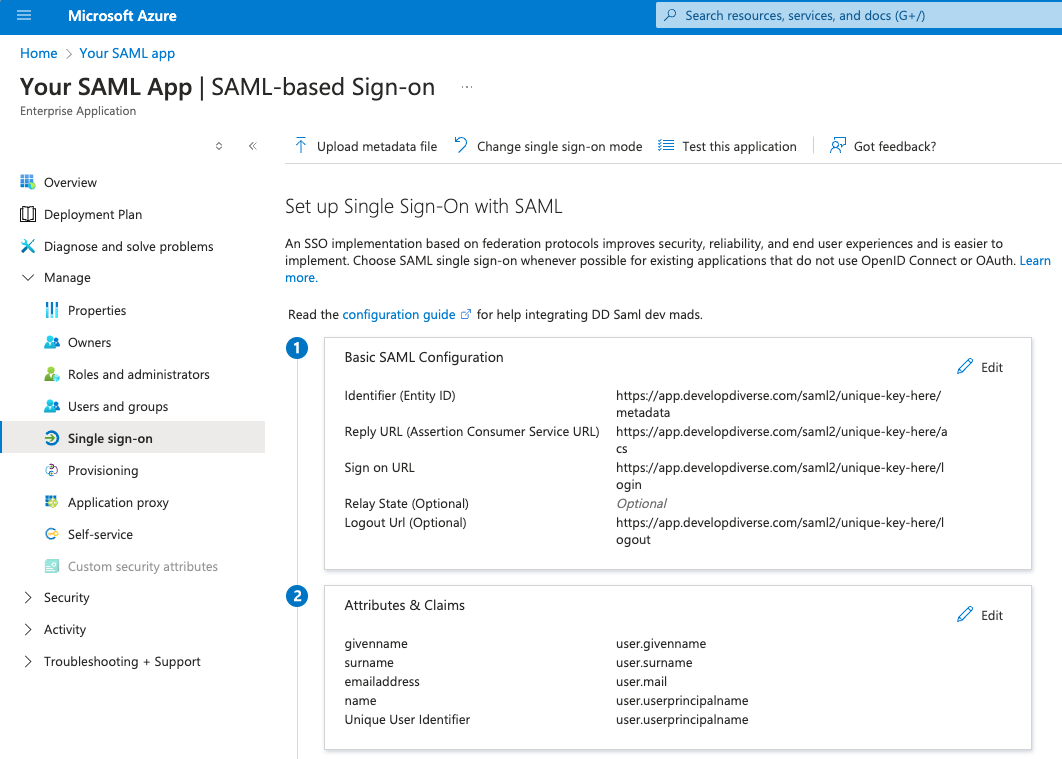
If you are using Microsoft 365 Azure AD as Identity Provider, then the section “Basic SAML Configuration” needs to be updated.
If you are using Okta, you will have to setup the SAML settings as shown in below image.
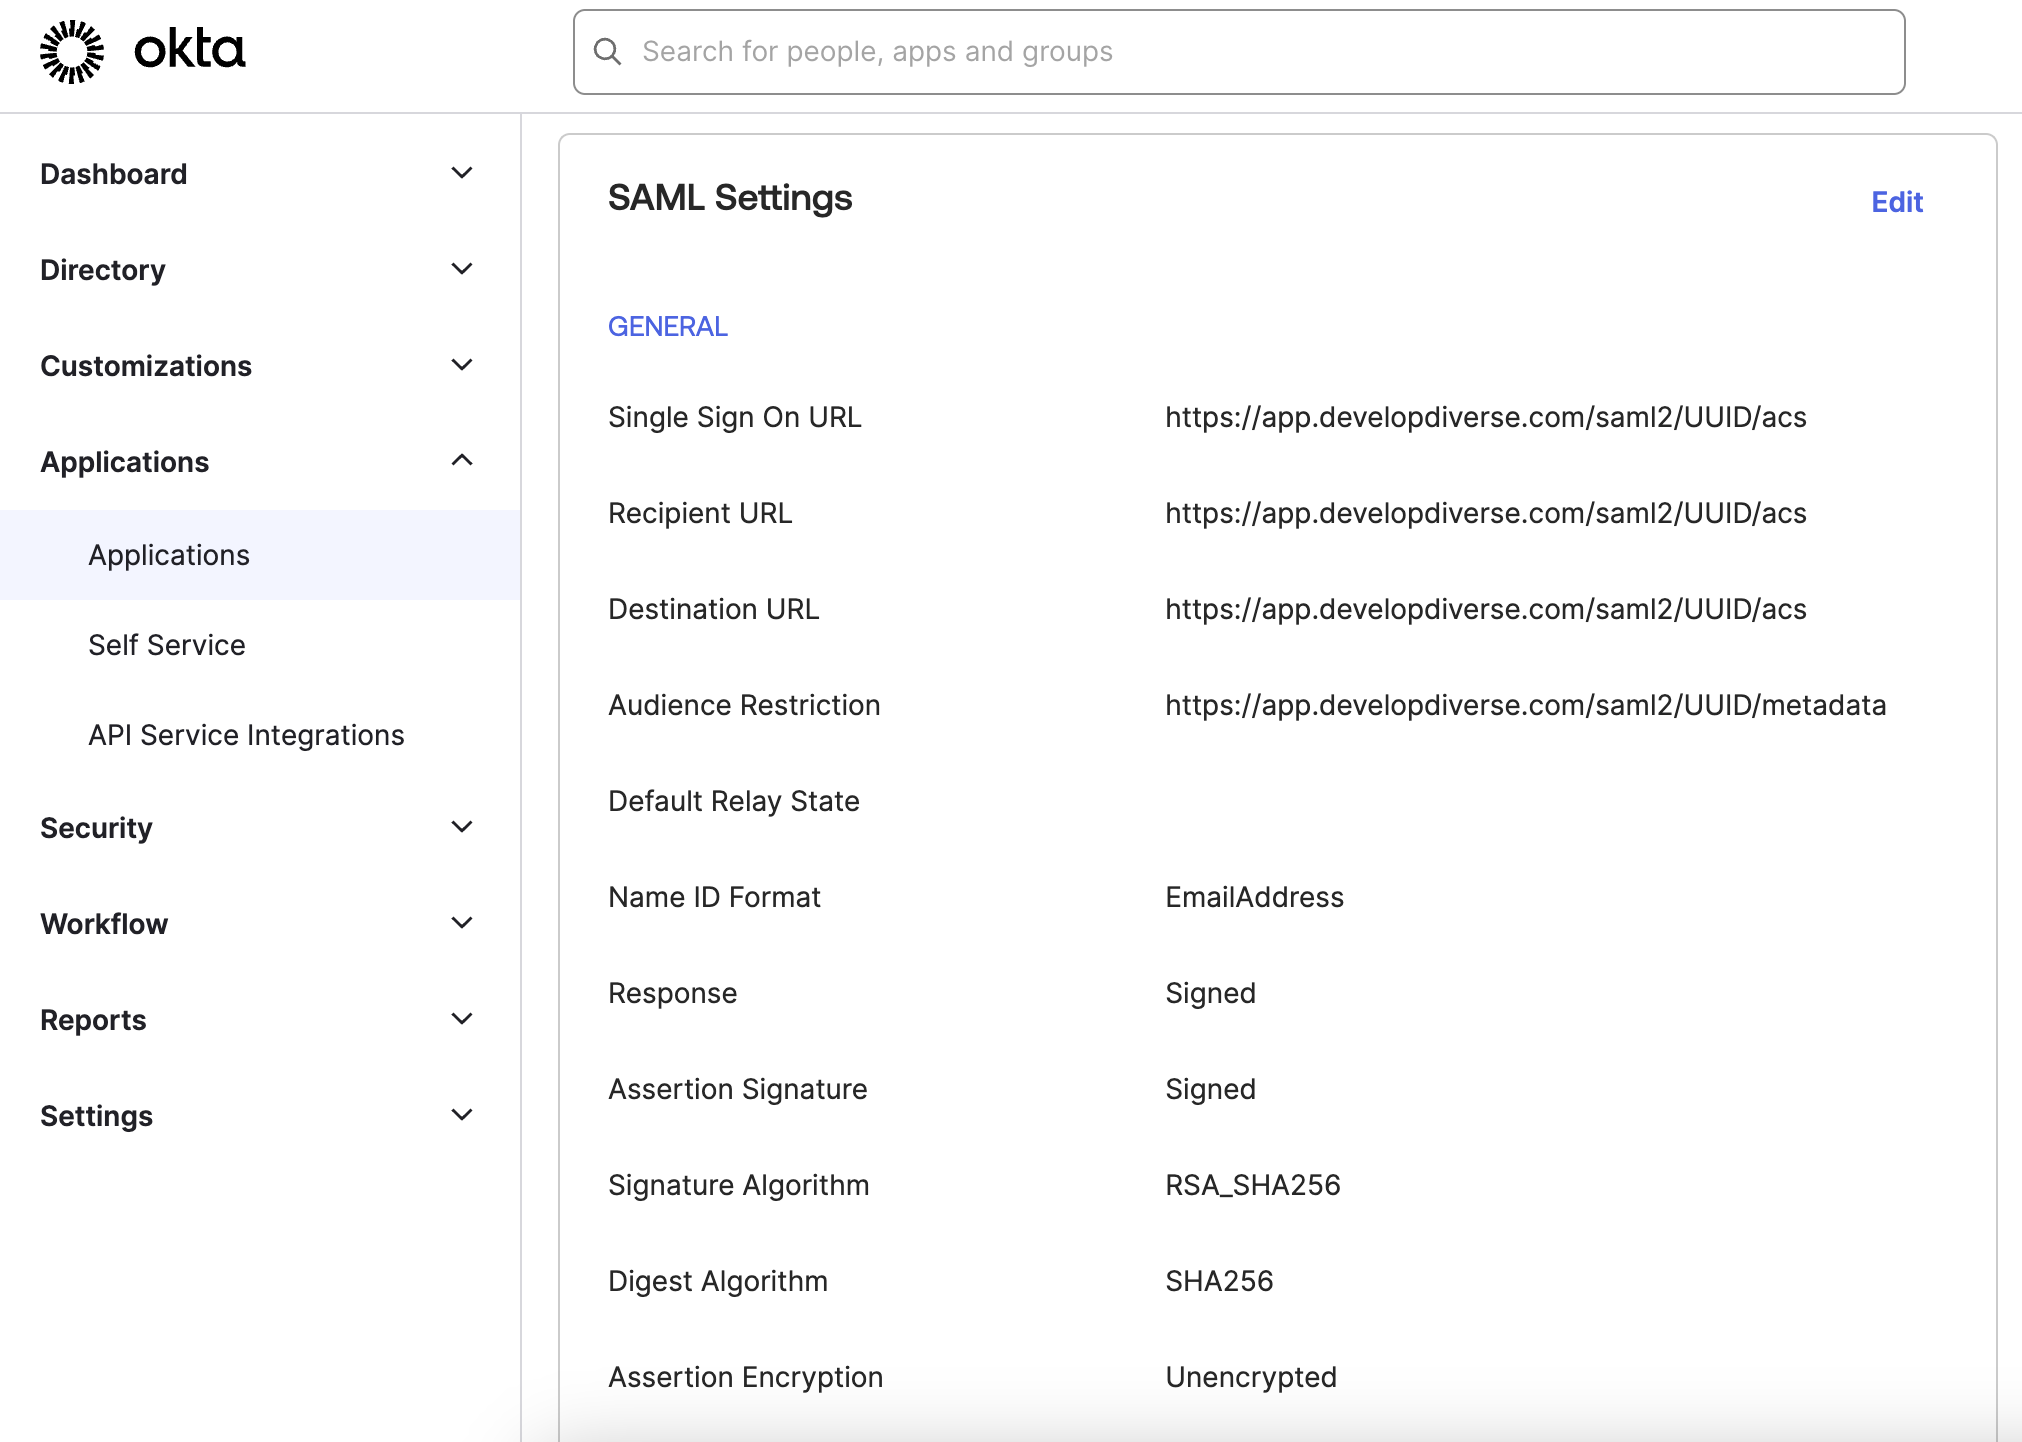
The claims in Okta, claims should be the following:
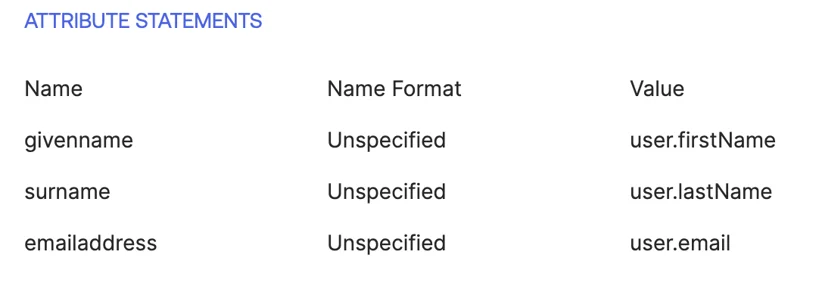
Supported Claims
- givenname user.givenname
- surname user.surname
- emailaddress user.mail
- displayname user.displayname