Text Entry History

If you’re on the Professional plan, every change made to text entries is automatically tracked, providing complete transparency and accountability. You can easily view these changes by clicking on History in the upper right corner of the text entry editor.

What Information is Tracked?

The History feature logs the following details:

  • Creating and Updating Text: Every time a text entry is created or updated.
  • Inclusivity Score Changes: Any adjustments to the inclusivity score.
  • Adding and Removing Collaborators: Changes to who can edit or view the text entry.
  • Changing Assignee: Reassignments of tasks within the text entry.
  • Updating Metadata: Modifications to status, language, or other metadata.
  • Replacing Biased Words and Sentences: Any instances where biased language is corrected.

With the History feature, you can easily review the evolution of your text entries and ensure that every change aligns with your inclusivity goals.

Public Performance

The Public Performance feature allows you to monitor inclusivity scores, track performance over time, and identify gaps between your LinkedIn presence and Develop Diverse content.

Accessing Public Performance

  1. Navigate to the Insights tab in the left menu.
  2. Click on Public Performance in the upper menu.

Features Based on Your Subscription Plan

The insights and actions available in Public Performance depend on your subscription plan:

  • Essential Plan:
    • Monthly Scans: Your public performance data is updated monthly.
    • Monthly Reports: Receive a monthly overview of your performance.
  • Professional Plan:
    • Daily Scans: Your public performance data is updated daily.
    • Weekly Reports: Receive detailed reports every week.
    • Automatic Follow-Up: Authors receive alerts for low-performing job ads.
    • User Assignment: Assign users to follow-up actions.
    • Drill-Down on Job Ads: Gain detailed insights by drilling down into individual job ads.

Job Ads below Inclusivity Target:

  • Highlights the number of public job ads falling below your company’s inclusivity target.

Gap Analysis:

  • Compares the number of public job ads (LinkedIn) versus those in your Develop Diverse platform.
  • Helps identify gaps in inclusivity monitoring and optimization.

Total Job Ads:

  • Displays the total number of public job ads currently active.

Inclusivity Score Changes:

  • Indicates if the inclusivity score has changed compared to the previous week.
  • Enables tracking of performance.

Public Inclusivity Score:

  • Tracks the overall inclusivity score of your company’s public job ads over time.
  • Provides shareable metrics for reporting purposes.

Inclusivity Score Per Location:

  • Tailored for companies with multiple locations to ensure inclusivity targets are met across all branches.

Inclusivity Score Distribution:

  • Provides an overview of inclusivity levels across all public job ads (inclusive, non-inclusive, strongly non-inclusive).

Job Ad Length:

View the distribution of the length of job ads created in Develop Diverse. Ideally all your job ads have a job ad length between 300 and 650 words. See here the grouping:

Too short job ad: 0-150 words
Short job ad: 151 – 299 words
Ideal job ad: 300 to 650 words
Long job ad: 651 – 800 words
Too long job ad: >800 words

Public Job Ads (Professional plan only):

  • Offers easy access to job ads that fall below the inclusivity target.
  • Click on the job ad to start editing.
  • As an Admin, you can assign someone for improvement to ensure your inclusivity target is met.

Create, edit and use Teams

Admins, take charge of team creation and editing. Here’s a user-friendly guide on creating and managing teams:

1. Access Teams

To find Teams, click on your avatar in the top-right corner, go to Account Settings, and look for Teams under User Management.

2. Create a New Team

Click on “New Team” to initiate the creation of a new team. Fill in the team name, assign a team owner, and add team members.

3. Edit Teams

To edit a team, click on the team you want to modify. Add or remove team owners and members as needed.


Collaboration Settings

Depending on collaboration settings, a team’s entries may be visible for sharing within the team.

Dashboard Insights

All team performances are conveniently displayed in your dashboard. Stay informed about your team’s activities and contributions.

Managerial Control

As a manager, you have the authority to add or remove members from your team. Keep track of your team’s performance on your dashboard.

Text Entry Statuses

Understanding the different statuses of your text entries is crucial for effective management. Here’s a comprehensive guide to the four primary text entry statuses:

Draft

Draft status indicates that the text entry is a work in progress. It hasn’t been finalized or submitted for review.

Actions:

  • Edit and refine the content.
  • Collaborate with team members for input.

Reviewing

Reviewing status means that the text entry is being checked by the right people to see if it’s okay.

Actions:

  • Await feedback from reviewers.
  • Make necessary edits based on feedback.

Published

Published status means the text entry has been approved and is accessible to the intended audience.

Action:

  • Celebrate the successful publication!
  • There is the possibility to save the text entry as a template for future use.

Closed

Closed status indicates that the text entry has reached the end of its lifecycle or is no longer active.

Export Text Entries

Export all your created text entries with these simple steps. Depending on your user role and collaboration settings, the entries you see may vary.

1. Access Jobs or Employer branding text entries

Navigate to jobs or employer branding text entries through the header navigation.

2. User Role and Collaboration Settings

  • Admins: You have visibility into all entries in the account.
  • Managers: You see entries from your teams. If collaboration is set to “everyone in the organization can collaborate,” you see all entries.
  • Members: You see your own entries. If collaboration is team-centric, you see entries from your team. If collaboration is organization-wide, you see all entries.

3. Filter Your Entries

Utilize the filter option on the right upper side above the list. Filter based on your criteria to narrow down the displayed entries.

4. Export to Excel

To export the list of entries, click on “Export” at the top left of the list. The exported file includes the following data:

  • Req ID
  • Title
  • Teams
  • Author
  • Initial Body
  • Body
  • Initial Score
  • Score
  • Text Type
  • Status
  • Experience Level
  • Language
  • Department
  • Country
  • Created At
  • Last Modified

Company Inclusivity Target

As an Admin, set your company target for your company by going to the account setting via clicking on your avatar at the right upper corner. In the paragraph Inclusive Writing, there is a heading Set your company target for the inclusivity score.

Our advice is to set the target on 90, as a job ad with an inclusivity score 90 does not exclude any group increasing the attractiveness of your job ad for a bigger group.

This goal impact when you are informed when a job ad does not reaches your inclusivity target and makes you easily monitor how you are performing against this target.

As an admin, you can tailor your company’s inclusivity target effortlessly with these simple steps. Follow the instructions below:

1. Access Account Settings

Click on your avatar in the right upper corner to access “account settings”.

2. Navigate to Inclusive Writing

Within the account settings, find the Inclusive Writing section. Look for the heading “Set your overall target for the inclusivity score.”

3. Set Inclusivity Target

Available options are 80, 85 and 90. We recommend setting the target at 90, as a job ad with an inclusivity score of 90 as this score is considered neutral, making your job ad more appealing to a broader audience.


Impact of Setting the Target

By setting the inclusivity target, you’ll be notified when a job ad falls short of your target. This feature allows you to easily monitor your performance against the inclusivity goal in your dashboard.

Corporate Terminology

As an Admin, you can tailor the Corporate Terminology of your company effortlessly. Here’s a step-by-step guide to set your corporate phrases:

1. Access Corporate Terminology

Click on your avatar in the top-right corner, go to Account Settings, and look for Corporate Terminology under Language Management.

2. Create a New Phrase

Click on the “New Phrase” button located in the upper right corner.

3. Add Corporate Phrases

Write the corporate phrase and select the language. Save the phrase by clicking “Create” or choose “Create & create another” to add multiple phrases consecutively.

Effect of Adding Corporate Terminology

Any phrases added to the Corporate Terminology will be excluded from our analysis on biased language. In simpler terms, if biased language is detected but is part of your corporate terminology, it won’t be highlighted or counted in the inclusivity score.

To stay informed about the impact of biased corporate terminology, the admin dashboard displays the difference in inclusivity scores with and without considering the corporate terminology.

Job Ad Templates

Create, edit, search, and share templates using our platform. Follow these straightforward steps for seamless template management.

1. Create New Templates

Generate a new text entry and save it as a template by clicking on “Save as Template” by utilizing the “Action” button located in the upper right corner of the editor.

2. Edit Templates

To access the template overview, click on Jobs in the top navigation, then select Template. Find the template you want to update and click Edit. You can edit templates you’ve created, but for other templates, you’ll need to ask your admin for help.

3. Search for Templates

Looking for a specific template? You have two options:

  • Search by Job Title: Enter the job title in the search field.
  • Filter Results: Click on the filter icon above the templates to filter by department, seniority, and language.

4. Share Templates

You have two options:

  • Share your filtered template search results by copying the URL and sending it to others. The recipient will view the template overview with your applied filters.
  • Open the template and click “Actions” and “Share Template” to share the URL of the template with your colleagues.

5. Create a Job Ad from a Template

To create a job ad from a template:

  • Navigate to the template overview through the left navigation.
  • Click on the “New” button for the template you want to use for your new job ad.

Inclusion Indicator

Your text is analyzed on how included 5 different groups feel based on your word choice. The groups are Gender, Age, Ethnicity, Disability and Neurodiversity. Each line of people icons represents a specific demographic group. The more included the group feels based on your text, the more people icons is colored.

Gender
It is divided into man, woman and non-conforming (which includes non-binary people and other LGBTQ+ people).

Age
Older people often don’t relate to the same kind of language as their younger coworkers.

Ethnicity
The category is divided into two groups – the advantaged and the disadvantaged ethnicities of your region.

Disability
Represent how included people feel in your text based on their disability status.

Neurodiversity
Describes the wide variation in brain function and behavioral traits of people. With a more inclusive text you will ensure that people feel included, no matter how they approach problems or social situations.

Text Accessibility Scores

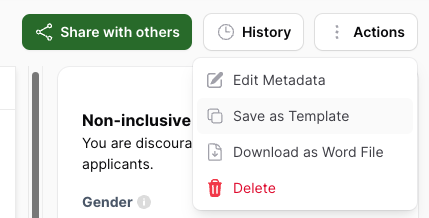
The text accessibility is evaluated on two scores: The Readability and the Word Count.

Readability score
This score tells us how easy your text is to read.

The readability score uses something called the Flesch-Kincaid Reading Ease score, which ranges from 0 (Extremely difficult to read. Best understood by university graduates.) to 100 (Very easy to read. Easily understood by an average 11-year-old student.). We calculate a score for your text, and then we compare it to scores from other texts in our database. This shows you how well your text performs in terms of readability in comparison with others.

Here’s what the readability score means:

  • If your score is between 0 and 19, your text is much harder to read than most texts. Try using shorter sentences and simpler words to make it easier to understand.
  • If your score is between 20 and 25, your text is somewhat harder to read than the average text. Consider breaking up long sentences and using common words to improve readability.
  • If your score is between 26 and 29, your text is just fine! It’s as readable as the average text.
  • If your score is between 30 and 34, your text is more readable than the average text.
  • If your score is higher than 34, congratulations! Your text is a lot more readable than most texts.


There are only good reasons to get the score up the scale.

These days, most job ads are published online. It has many benefits, but note that several studies find that we skim much more when reading online. Therefore you want each of your sentences to be easy to understand in a glance.

It can be tricky in job ads as we tend use long industry terms and specialized language. But this is not necessarily needed, even in ads for highly senior roles. People who are well trained readers, actually prefer easier texts more than less trained readers, studies have shown.

Get the score up like this

Improving your readability score means that your text gets easier to read. The higher the score, the higher the readability. You do this by using shorter and fewer words pr. sentence.

Here are a few examples:

“Achieve an objective”  “meet a target”

“Carry out an evaluation of”  “Evaluate”

“If this is the case”  “If so”.

“Concerning”  “on”.


Word count
The total number of words in the text.

There is an ideal length for your text. For example, in the case of job ads, we suggest job ads between 300 and 650 words. This holds the applicant’s interest and also conveys the complete message. Should the job ad be too short, you may fail to deliver your intended message. Conversely, if it’s too long, you may lose the attention or interest of potential applicants.

Inclusivity Score

This score represents how biased your job ad is. It is displayed on the right side of the Develop Diverse text editor.The score is calculated based on the percentage of biased words compared to the total number of words in the text. It is based on established research studying the effect of job ads on applicants.

Scoring

  • 69 or below is strongly non-inclusive,
  • between 70 – 89, the ad is considered non-inclusive and slightly biased,
  • between 90 – 99, the ad is considered neutral,
  • and a value of 100 represents a job ad free of bias.

Our recommendation is to have an Inclusivity Score of 90 or above.

Replacing gendered words/phrases with the neutral alternatives proposed by Develop Diverse increases this score.